Secondhand Fashion Week:
Day Two - The Polished Teacher
(Well, I try!)
Emma is turning out to be a very good photographer, don't you think?
Earrings - Belk's
Necklace - My mother : )
Ring - Gift Shop
Shoes - Belk's
Blouse - Yard Sale
Condition: Very Good/Used
Brand: Ann Taylor Loft
Price: $1.00
Skirt - Consignment Store
Condition: Good/Used
Brand: Willi Smith
Price: I think it was $7.00
I don't usually pay that much for an item when thrift shopping but I have this thing with linen skirts, I have, like, seven of them!
Today was rather busy. I have more students on Monday than any other day of the week! I must say I am glad to be sitting back, relaxing, typing this post and listening to music from such films as Penelope, Robin Hood (bet you didn't know there was a soundtrack!) and Master and Commander. Now, on to the tutorial!
Dress Shirt Pillow Tutorial
Supplies:
Enough Scrap Fabric to cut nine 5" squares
A fairly large (woman's medium and up) Button Down Shirt
Straight Pins
Scissors
A 14" square pillow form
Sewing Machine and Thread
Iron and Ironing Board
A Rotary Mat and Cutter or A piece of Paper cut to 5" square
Instructions:
Seam allowance is 1/4 inch.
1) Cut out nine 5" squares from your fabric using either your mat and cutter or your paper pattern.
2) Arrange your squares in a pleasing manner.
3) Begin sewing them together one row at a time starting with the top row and working your way down...
until all three rows are sewn.
4) Press your seams. You should press the seams of the top and bottom row towards the inside and the seams of the middle row towards the outside.
5) Begin sewing your rows together. Making sure to match and pin your seams.
6) Press your seams towards outside.
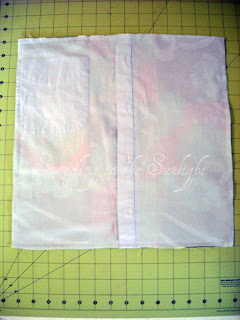
7) Button up your shirt and press the front. Place your patchwork on top centering it over the buttons. (Note: you will have cut two pieces from the shirt but you only want the one with the buttons.)
8) Pin your two squares together and sew all the way around the outside edge.
9) Clip diagonally across each corner being careful not to cut your stitching.
10) Unbutton your shirt and turn your pillowcase right side out.
11) Use the point of your closed scissors to gently poke out the corners.
12) Insert your pillow form!


7 comments:
Cute!
Great look! Very classy. :) (Oh yes, and I love the Penelope soundtrack!) Also, good job on the tutorial - I like how you used the button-up front of the shirt - clever!
Great outfit!! I love love love the shirt with that skirt! The scalloped edge on the skirt is so wonderful. Great tutorial as well Caroline!
Beautiful outfit Caroline...and what an interesting tutorial as well!
I love the outfit.. and the pillowcase is so neat! :) Thanks!
~Marissa
I love it! You have such an eye for patterns and colors.
That is so Cute Caroline!
~Mylena
Post a Comment